How to reinstall
To reinstall an uninstalled ELECOM Mouse Assistant, follow the steps below.
Access ELECOM’s website as listed below and download the latest version of the application.
http://www.elecom.co.jp/support/download/peripheral/mouse/assistant/
- To search based on model number, input the model number printed on the underside of the mouse and click on the search button.
- To search based on product category, under “Input devices”, click on “Mouse”. This will bring you to another page where you can either search by inputting the model number printed on the underside of the mouse or click on the model number.
- Please install using a user account with administrative rights.
- Your device needs to restart after installation. It is recommended to close all applications before performing the installation.
- Unzip the downloaded file 'mouse_driver_maxxxxx. zip' (xxxx is different depending on the version) to your desktop, etc.
Depending on your operating environment, clicking on “Open file” after download may cause it to unzip.

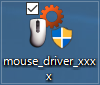
- Double-click on 'mouse_driver_xxxx.exe' (xxxx is different depending on the version) in the unzipped folder.
- Installation will begin. Follow the instructions on the screen to proceed.
- Click on the “Yes” button when the “User Account Control” window appears.
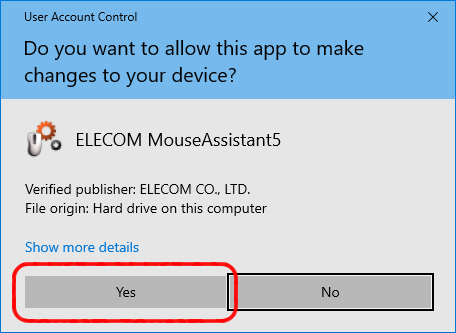
- Click on the “Yes” button when the “User Account Control” window appears.
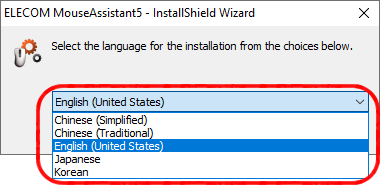
- Select English under language and click on the “OK” button.
- Click on the “OK” button.
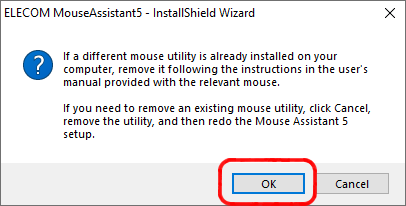
- If other mouse utility programs are installed, click on the “Cancel” button to uninstall.
- If an older version of Mouse Assistant is installed, follow the instructions to uninstall.
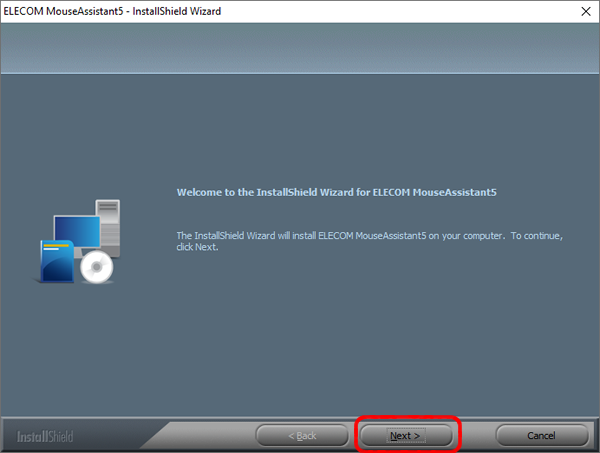
- Click on the “Next” button.
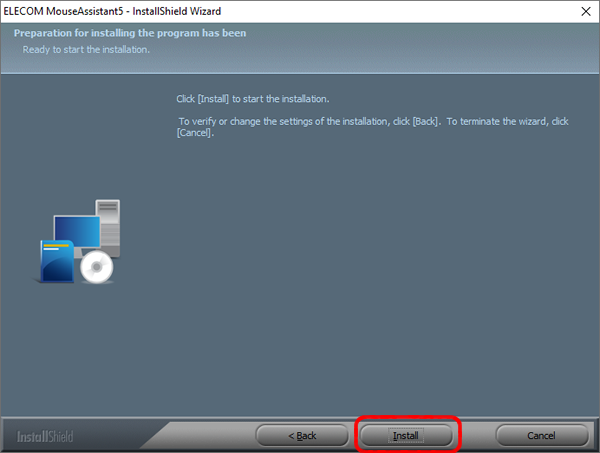
- Click on the “Install” button.
- The settings page for the shortcut key on the middle button will appear with Windows® 8.1.
Select from the combo box and click on the “Next (N)” button.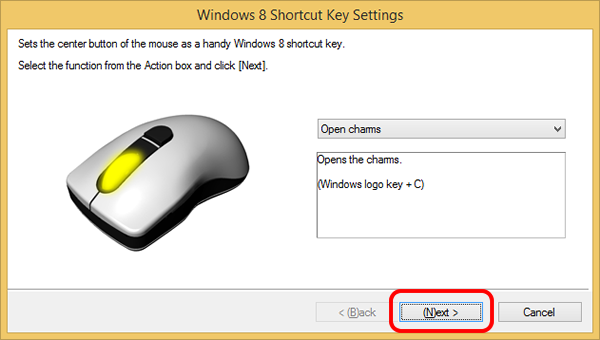
* Clicking “Cancel” will stop the installation.
Installation cannot be cancelled from here on.
- The settings page for the shortcut key on the middle button will appear with Windows® 8.1.
- When installation is complete, make sure that “Yes, I want to restart my computer now.” is checked and click on the “Finish” button.
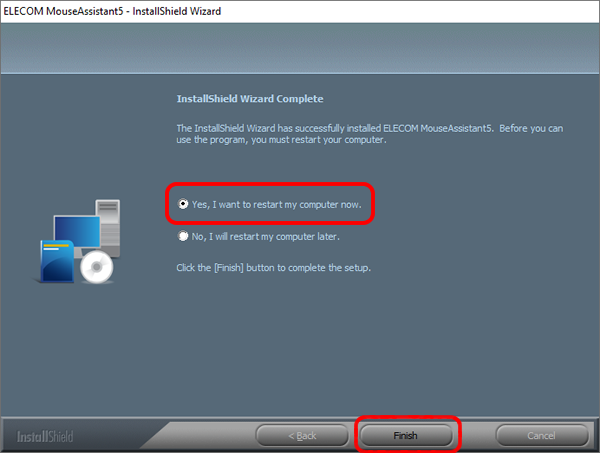
Installation is complete.